Running Jupyter with Docker
Learn how to easily package up your Jupyter project environments with Docker. The goal of this article is to share some tips on what I’ve learned after sifting through the Jupyter Docker Stacks docs in order to come up with a nifty Docker solution to fit my needs.
In this article we will cover:
- the basics of Jupyter - what is it, why is it useful 🚀
- why use Docker with Jupyter - what is it, why is it useful 🐳
- example - running a Jupyter container 💯
- info on the official Jupyter images - good for customizing 📝
- example - containerize a Jupyter project to share 🧩
- example - Jupyter dev container to use anywhere, anytime 💻
Quick primer on Jupyter 🚀
(skip ahead if you’re familiar)
Jupyter Notebooks are a great resource to add to your dev toolkit. Notebooks are essentially applications you run on your web browser that allows you to write, edit, and execute code via a cool UI.
Think of it as an isolated coding sandbox, with the added perks of displaying visualizations, LaTeX equations, text, Markdown, images, running bash commands, and more. Notebook files have an .ipynb extension, and its contents are stored as JSON. They can be exported to different file formats like PDF, HTML, LaTeX which makes it easy to share your code with others.
In addition to notebooks, JupyterLab is a full blown web-based ecosystem to manage your notebooks and data. You can interact with your file system or open terminals and code consoles.
Both the Jupyter Notebook and JupyterLab are maintained by Project Jupyter. You might’ve seen Jupyter notebooks frequently used amongst the data science community, but its ease of use and flexibility can benefit everyone.
Docker in the mix 🐳
Installing the Jupyter Notebook server is as easy as a pip install or nothing at all if you’re using the conda Python distribution. But what if you didn’t want to install something on your host machine?
Sure, you can use virtual environment to do so. But virtual environments only isolate Python dependencies. A Docker container virtualizes an entire OS, acting more like a virtual machine in this case (not really, but for this example yes).
Think about this . . . Say you had to connect to a Postgres instance and wanted to run some analysis from that data in a Jupyter notebook.
-
Without Docker: You would need to install Postgres on your host machine, then install the Python dependencies (
psycopg2,jupyter) in a virtual environment. -
With Docker: Install Docker on your host machine. You can spin up containers from Docker’s offical Postgres and Jupyter images and connect them with docker-compose, all without installing any application dependencies.
Not to mention that spinning up containers makes the entire process very repeatable and portable, which is a good thing! 👍🏼
Let’s get started 💯
Make sure you have Docker installed on your system.
We will be using Jupyter’s official Docker images. There are a bunch of different ones, based on what packages you need or what languages you’re working with. I use the jupyter/scipy-notebook because I’ll be working with Python, and this image already has some Python packages installed like pandas as well as the Jupyterlab extension.
Let’s start off with a minimal example. We’ll be using the Docker CLI for all commands.
Pull the image of choice:
docker pull jupyter/scipy-notebook:latestCheck that the image is downloaded by running docker images:
REPOSITORY TAG IMAGE ID CREATED SIZE
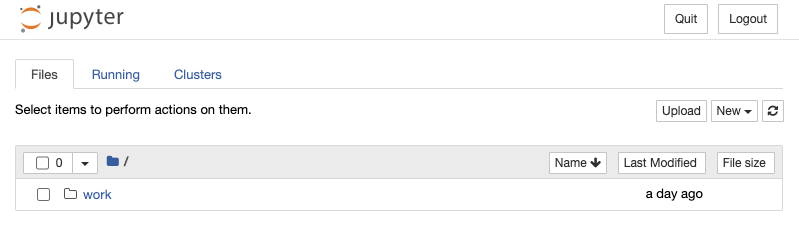
jupyter/scipy-notebook latest 015b3b1db6a8 30 hours ago 2.64GBThe image is like the blueprint of the application container. We can run the container with docker run -p 8888:8888 jupyter/scipy-notebook. This starts a container running the Jupyter Notebook server, exposing the container’s port to the host machine’s port: docker run -p [HOST_MACHINE_PORT]:[CONTAINER_PORT] [IMAGE_NAME].
Executing the command: jupyter notebook
[I 19:00:12.776 NotebookApp] Writing notebook server cookie secret to /home/jovyan/.local/share/jupyter/runtime/notebook_cookie_secret
[I 19:00:14.817 NotebookApp] JupyterLab extension loaded from /opt/conda/lib/python3.8/site-packages/jupyterlab
[I 19:00:14.818 NotebookApp] JupyterLab application directory is /opt/conda/share/jupyter/lab
[I 19:00:14.823 NotebookApp] Serving notebooks from local directory: /home/jovyan
[I 19:00:14.824 NotebookApp] Jupyter Notebook 6.1.4 is running at:
[I 19:00:14.825 NotebookApp] http://12d31a95135b:8888/?token=7a88c4c47b9c1773b1b3e4fbf8275e55e60cc8dfbfa1b4a0
[I 19:00:14.825 NotebookApp]  or http://127.0.0.1:8888/?token=7a88c4c47b9c1773b1b3e4fbf8275e55e60cc8dfbfa1b4a0
[I 19:00:14.827 NotebookApp] Use Control-C to stop this server and shut down all kernels (twice to skip confirmation).
[C 19:00:14.838 NotebookApp]

    To access the notebook, open this file in a browser:
        file:///home/jovyan/.local/share/jupyter/runtime/nbserver-7-open.html
    Or copy and paste one of these URLs:
        http://12d31a95135b:8888/?token=7a88c4c47b9c1773b1b3e4fbf8275e55e60cc8dfbfa1b4a0
     or http://127.0.0.1:8888/?token=7a88c4c47b9c1773b1b3e4fbf8275e55e60cc8dfbfa1b4a0
Now if we visit one of the URLs shown in the output, we can access the notebook server.
You can do Cmd+C or Ctrl+C to exit the container. If you do docker ps -a or docker container ls -a you can see the container in a stopped state.
CONTAINER ID IMAGE COMMAND CREATED STATUS PORTS NAMES
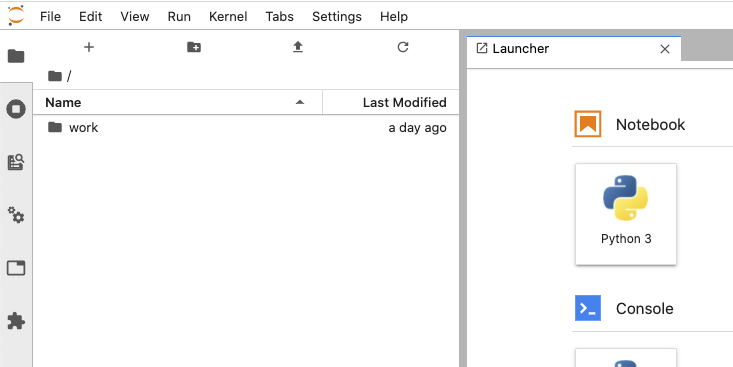
12d31a95135b jupyter/scipy-notebook "tini -g -- start-no…" 35 minutes ago Exited (130) About a minute ago quizzical_nightingaleWhat about JupyterLab?! Run docker run -p 8888:8888 -e JUPYTER_ENABLE_LAB=yes jupyter/scipy-notebook to start a new container with the JupyterLab extension.
Some notes on these Jupyter Docker images 📝
The docs are full of information and highly suggested you read through them. I’ll just highlight some important points here though.
-
The Jupyter Docker images build off each other in a hierarchical tree structure. Check out the source on Github and view each notebook’s Dockerfile to see exactly how the images are composed.
-
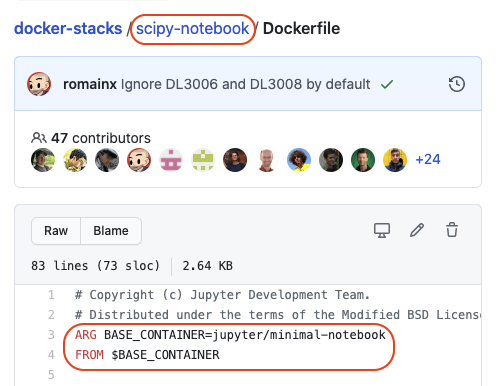
For example, the hierarchy for the scipy notebook Dockerfile is
base->minimal->scipy: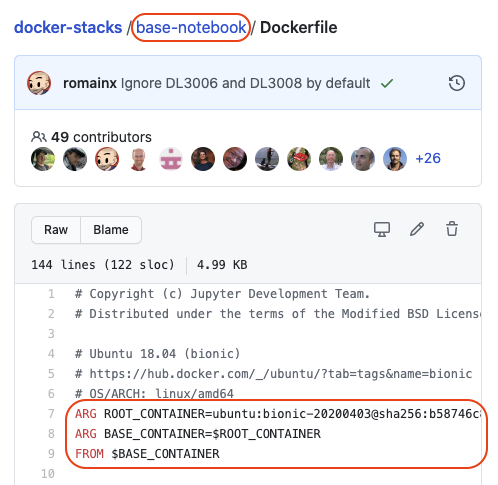

-
The default notebook user is called
jovyan. When you start the docker container, the notebook server is started from/home/jovyan. You can rundocker exec -it [CONTAINER_ID] bashto explore the container’s file system.
    ~ docker exec -it 12d31a95135b bash
    (base) jovyan@12d31a95135b:~$ pwd
    /home/jovyan
    (base) jovyan@12d31a95135b:~$ ls
    work
    (base) jovyan@12d31a95135b:~$
-
There are instructions on how to add Python 2, or even change the default user.
-
The base-notebook image exposes port
8888, so all of the inherited images use the same port. -
The base-notebook runs a
start-notebook.shscript defined in its Dockerfile, which all other child images inherit and run by default. This script configures some container environment stuff and starts up the Jupyter Notebook server. There is also astart.shscript which is a more generic wrapper helpful for when you’re defining your own Dockerfile and want to kick off your own command. This is exactly what we’re going to next.
Bringing it all together 🧩
The examples in the docs are great for getting started. We can extend this further into our own Dockerfile so we can build an image specifically for our use case.
For example, if we had a directory with some data and other Python dependencies running on virtualenv, how do we containerize this?
Create a requirements.txt file:
pip freeze > requirements.txtIn your project directory create a file called Dockerfile and a .dockerignore.
Your directory might look something like this by now:
.
├── .dockerignore
├── Dockerfile
├── data
│   ├── books.csv
│   └── employees.csv
├── notebooks
│   ├── awesome-stuff.ipynb
│   └── cool-stuff.ipynb
├── requirements.txt
└── venv
Add the following to the .dockerignore file:
venv
Dockerfile
Add the following to the Dockerfile:
FROM jupyter/scipy-notebook:latest

USER $NB_UID

WORKDIR /home/$NB_USER

# Copy everything except what's defined in .dockerignore
COPY . work

RUN pip install -r work/requirements.txt && rm work/requirements.txt

USER root

RUN fix-permissions $CONDA_DIR && \
    fix-permissions /home/$NB_USER

USER $NB_UID

ENTRYPOINT ["start.sh", "jupyter", "lab", "--NotebookApp.token=''"]
Build the Docker image from the Dockerfile in the directory:
docker build -t my-cool-jupyter-project .Now run your container from your image:
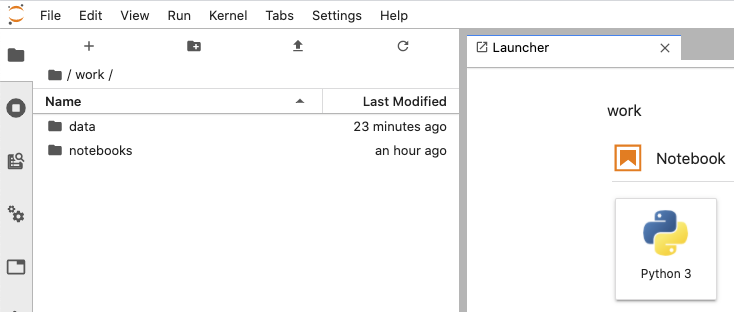
docker run -dt -p 8888:8888 my-cool-jupyter-projectIf you visit localhost:8888 and navigate to the work directory, you can see our data.
In a nutshell, what the Dockerfile does is copy our stuff into the work directory and install our packages as user jovyan, then switches to user root in order to set group read/write permissions on /opt/conda and /home/jovyan/work. Then we switch back to user jovyan to run Jupyterlab. Keep in mind that the environment variables and permissions protocol are defined in the base notebook’s Dockerfile.
The args passed in the Dockerfile entrypoint bypasses the need to add a token in the url, which in turn makes sense to run the container in the background with the -d flag (detached mode).
Keep in mind that with this approach, your notebooks are baked into the running container. Changes made to them are persisted even if you stop and restart the container, but they’re gone for good when you remove the container.
You can, however, copy stuff from a container to your host machine with the docker container cp command:
~ docker ps
CONTAINER ID        IMAGE                     COMMAND                  CREATED             STATUS              PORTS                    NAMES
e0759d105728        my-cool-jupyter-project   "start.sh jupyter la…"   7 minutes ago       Up 7 minutes        0.0.0.0:8888->8888/tcp   loving_brattain
~
~ docker container cp loving_brattain:/home/jovyan/work/notebooks/cool-stuff.ipynb .
Containerizing your project is an excellent option if you want to share a snapshot of your work with others. Just build the image, upload it to DockerHub, and others can pull down your image and have their own copy of your project.
A simple Jupyter dev setup 💻
If you just want to hack on stuff with Jupyter notebooks within some dev environment, you can spin up a container using this Dockerfile.
FROM jupyter/scipy-notebook:latest

COPY requirements.txt /tmp/

RUN pip install -r /tmp/requirements.txt && \
    fix-permissions $CONDA_DIR && \
    fix-permissions /home/$NB_USER

ENTRYPOINT ["start.sh", "jupyter", "lab", "--NotebookApp.token=''"]
Build the image:
docker build -t my-jupyter-sandbox -f /path/to/DockerfileRun the container from the image, mounted to the container’s /home/jovyan/work directory from any directory you want:
docker run -dt -p 8000:8888 -v "$PWD":/home/jovyan/work my-jupyter-sandboxThis setup acts more like a portable environment that you can spin up, and expose to any directory you like on your host machine. Any changes on your host or container is reflected, and you don’t even have to be in the host directory once the container is running if you’re interacting via the Jupyter interface.
I hope these examples were helpful in demonstrating how to containerize a Jupyter project or set up a Jupyter environment with Docker. The main goal was to put together tidbits from the Jupyter Docker Stacks docs as well as their Github repos that I’ve observed into a single reference that can benefit myself and others. If you’ve made it to the end, thanks a lot for reading and happy coding! ✨